Tutorial 3 - KIT207


The first thing I did for this tutorial was create the NavMesh which was fairly simple even though I had to do a lot of my own research to get it to work since I was using the new system. All I had to do was add the NavMeshSurface component onto a GameObject which I put onto the terrain, next, I modified the component so it would only include certain objects and not everything inside the scene (e.g. the car)
then after that, I changed some jump and drop height settings inside the navigation window which can be accessed through Window > AI > Navigation.
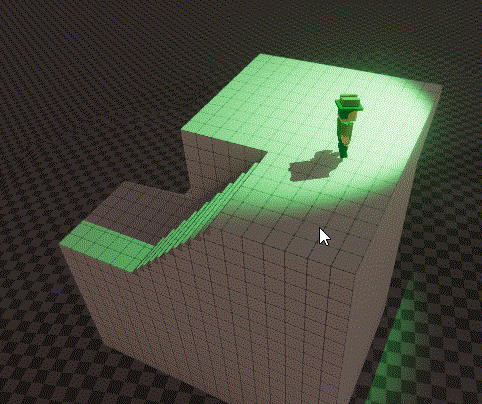
Then I clicked on bake on the NavMeshSurface component which produced the following...
Even though it isn't perfect, it works fine for the test scene. (Note: When I first baked, the jump links did not show so I had to click on Generate Links inside the NavMeshSurface component.)
Next, I added a moving obstacle to the scene which was fairly simple, I just had to create and animate an animation that would move an object and set it to loop which took a while to find since it wasn't inside the animation window but on the ANIMATION FILE WINDOW (bit weird).
Then I just added the NavMeshObstacle component onto the object and set the size so it would match the size of the object, of course after adding this object, I had to re-bake the NavMesh on the terrain GameObject.
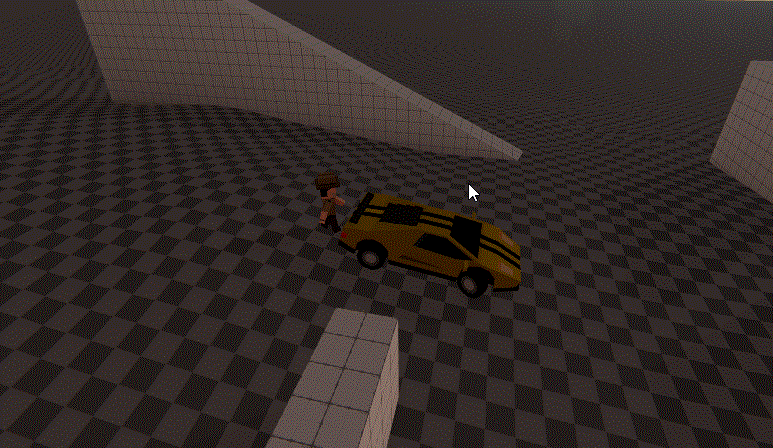
Then after that, I added a MouseTarget script onto my character prefab as well as the NavMeshAgent, then I set the MouseTarget script so it would target where I clicked onto the scene using Camera.main.ScreenPointToRay(Input.mousePosition); and set the NavMeshAgent component's destination to the mouse position.
using System.Collections;
using System.Collections.Generic;
using UnityEngine;
public class MouseTarget : MonoBehaviour
{
    // Update is called once per frame
    void Update()
    {
        if (Input.GetMouseButtonDown(0))
        {
            var ray = Camera.main.ScreenPointToRay(Input.mousePosition);
            if (Physics.Raycast(ray, out RaycastHit info))
            {
                GetComponent<NavMeshAgent>().SetDestination(info.point);
            }
        }
    }
}
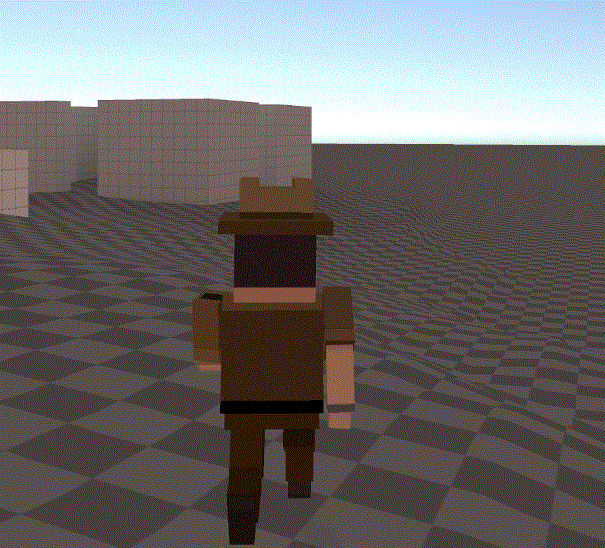
After that, I had to create a new script call CharacterAnimation which just checks the SquareMagnitude velocity of the NavMeshAgent and animates the walk animation if it's higher than 0.1.
using System.Collections;
using System.Collections.Generic;
using UnityEngine;
using UnityEngine.AI;
public class CharacterAnimation : MonoBehaviour
{
    NavMeshAgent agent;
    Animator animator;
    // Start is called before the first frame update
    void Start()
    {
        agent = GetComponent<navmeshagent>();
        animator = GetComponent<animator>();
    }
    // Update is called once per frame
    void Update()
    {
        animator.SetBool("Forward", agent.velocity.sqrMagnitude > 0.1);
    }
}
And this is the following result...


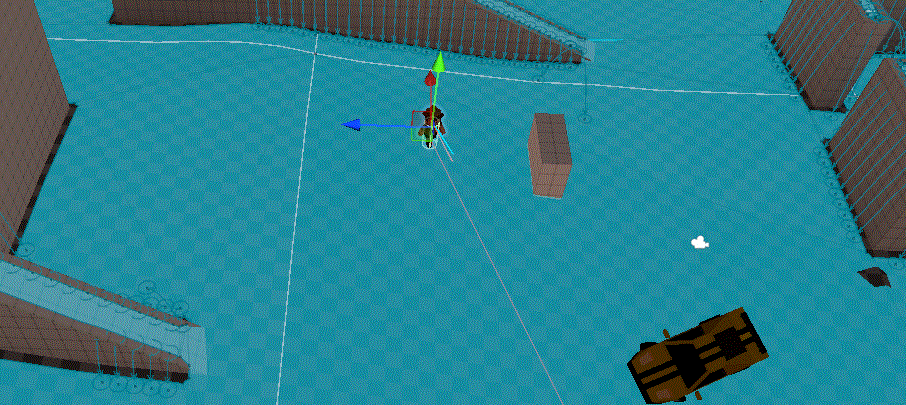
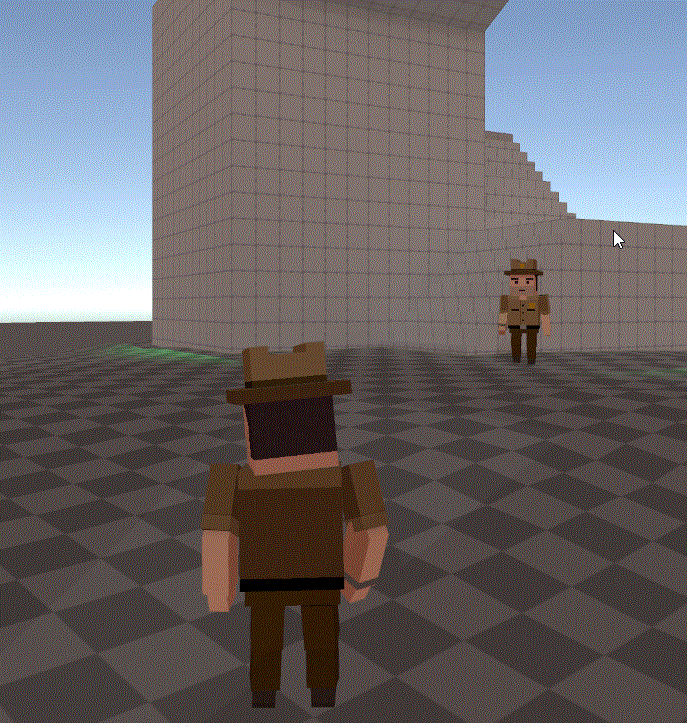
So now that we have the basics down, The next step was the change the AI so it would follow the player.
The first thing I did was modify the MouseTarget script to EnemyTarget and made a public variable for setting the target.
using UnityEngine;
using UnityEngine.AI;
public class EnemyTarget : MonoBehaviour
{
    NavMeshAgent agent;
    public Transform target;
    // Start is called before the first frame update
    void Start()
    {
        agent = GetComponent<navmeshagent>();
    }
    // Update is called once per frame
    void FixedUpdate()
    {
        agent.SetDestination(target.position);
    }
}
which produced the following...

This method is alright however, it's pretty basic, so lets add velocity prediction, The concept for a basic prediction algorithm is quite simple, You take the velocity of the target and add it onto the current target's position, so after doing a bit of research and some failed attempts, I made this script which calculates the difference between the previous and current position in the last Fixed Update (not Update because it was bugging out to Vector(0,0,0)) and multiplied it by a prediction threshold.
using UnityEngine;
using UnityEngine.AI;
public class EnemyTarget : MonoBehaviour
{
    NavMeshAgent agent;
    public Transform target;
    public float prediction = 20f;
    Vector3 previousTargetPosition;
    // Start is called before the first frame update
    void Start()
    {
        agent = GetComponent<navmeshagent>();
    }
    // Update is called once per frame
    void FixedUpdate()
    {
        if (target != null)
        {
            var diff = (target.position - previousTargetPosition) * prediction;
            agent.SetDestination(target.position + diff);
            previousTargetPosition = target.position;
        }
    }
}
Which produced the following.
Perfect!
Now for the last thing, To spawn enemies wherever I clicked on the screen, This was fairly simple to implement since I already had MouseTarget script already setup for this kind of thing, All I had to do was just Instantiate the enemy prefab at the position I clicked.
using System.Collections;
using System.Collections.Generic;
using UnityEngine;
public class MouseTarget : MonoBehaviour
{
    public GameObject prefab;
    // Update is called once per frame
    void Update()
    {
        if (Input.GetMouseButtonDown(0))
        {
            var ray = Camera.main.ScreenPointToRay(Input.mousePosition);
            if (Physics.Raycast(ray, out RaycastHit info))
            {
                var obj = GameObject.Instantiate(prefab, info.point, Quaternion.identity);
                obj.GetComponent<enemytarget>().target = transform.parent.transform;
            }
        }
    }
}
Which produced the following...
Great!
Using these concepts, we can already make a basic 3D dodge game or modify to for an FPS game which unfortunately, I am not into, but the concepts here could be used for many game designs.
Leave a comment
Log in with itch.io to leave a comment.